6.2. Piwik, A Web Analytics Platform
This Internet app uses a data container, dnsmasq, MariaDB, Nginx and OpenLDAP.
Piwik is a free and open source web analytics platform which can be self-hosted.
6.2.1. Configure DNS
Add an A record to point the domain to be used by Piwik to the IP address of the server.
6.2.2. Configure the MariaDB Database
Follow the instructions in Create a New Database and User in MariaDB to create a new user and a database both named as
piwik in the MariaDB database.
6.2.3. Set up Piwik Container
Create a data container for Piwik:
docker run -v /var/www/piwik --name piwik-data busybox /bin/true
To start the Piwik container, run the following command:
docker run -d --restart always --name piwik --dns $HOST_ADDR \
 --volumes-from piwik-data blober/piwik
The Dockerfile from which the image was generated is available.
For the first time the container starts will download and decompress Piwik to /var/www/piwik.
6.2.4. Configure Nginx
Now run the following command to set up Nginx, after replacing piwik.example.com with the domain of the Piwik
instance:
echo --volumes-from piwik-data >> ~/util/nginx-volumes.txt
cd $DOCKER_SHARE/nginx
PIWIK_URL='piwik.example.com'
sudo -s <<EOF
sed -e "s/@server_name@/$PIWIK_URL/g" \
 -e 's/@root@/piwik/g' \
 -e 's/@fastcgi_server@/piwik:9000/g' fastcgi.conf.tmpl > piwik.conf
sed -e "s/@server_name@/$PIWIK_URL/g" \
 -e 's/@root@/piwik/g' \
 -e 's/@fastcgi_server@/piwik:9000/g' fastcgi.tls.conf.tmpl > piwik.tls.conf
EOF
Optionally we can edit piwik.tls.conf to use a different TLS/SSL key instead of the dummy key.
Recreate and restart the Nginx container:
~/util/rerun-nginx.sh
6.2.5. Configure Piwik
Visit the Piwik instance in a browser (e.g. https://piwik.example.com), and follow the instructions to set up Piwik.
In the database setup page, according to our setup, the database server is db, database login is piwik, database
password is the one we generated earlier, and the database name is piwik. The table prefix can be any thing, even
empty.
6.2.6. Use Piwik with OpenLDAP
It is optional to use Piwik with OpenLDAP. If you decide not to use Piwik with OpenLDAP, you may skip this part.
Follow the instructions in Common Group Related Tasks in the OpenLDAP Database to create a new group piwik and add all users
who will be granted to use Piwik to this group.
First we need to install the LoginLdap plugin . To install the plugin, log into
the admin account of the Piwik instance, click the Administration link on the top right corner and then click the
Marketplace link. We should now be able to see an interface similar to Fig. 6.2.1.
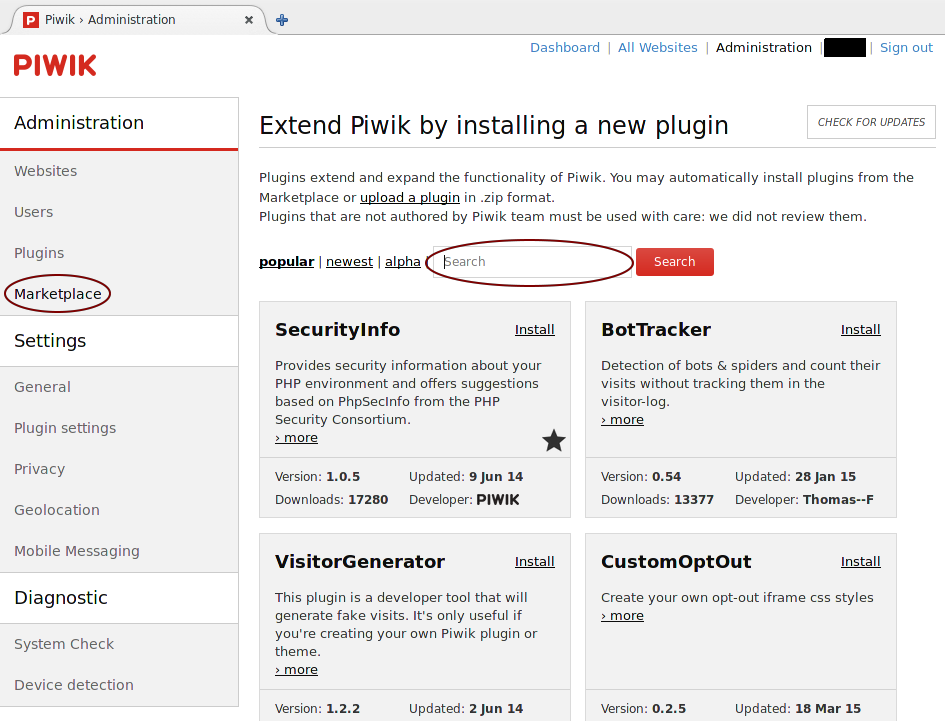
Fig. 6.2.1 Navigate to the Piwik Marketplace.
Then in the searchbox, search for LoginLdap, and we should now see the LoginLdap plugin in the plugin panel as shown
in Fig. 6.2.2.
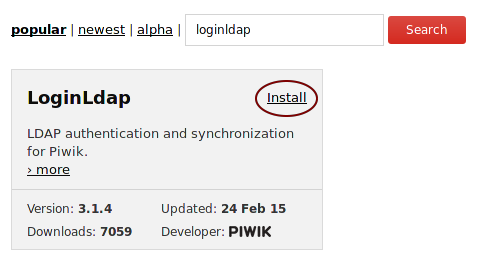
Fig. 6.2.2 Search for LdapLogin in Piwik Marketplace.
After that, click on the install link to install the plugin. If the installation is successful, we can click on the
Activate link to activate the plugin. Alternatively, we may follow the Piwik plugin installation guide and LoginLdap installation guide to install and activate the LoginLdap plugin.
After activating the LoginLdap plugin, we should be able to see an LDAP link in the administration panel as shown in
Fig. 6.2.3.
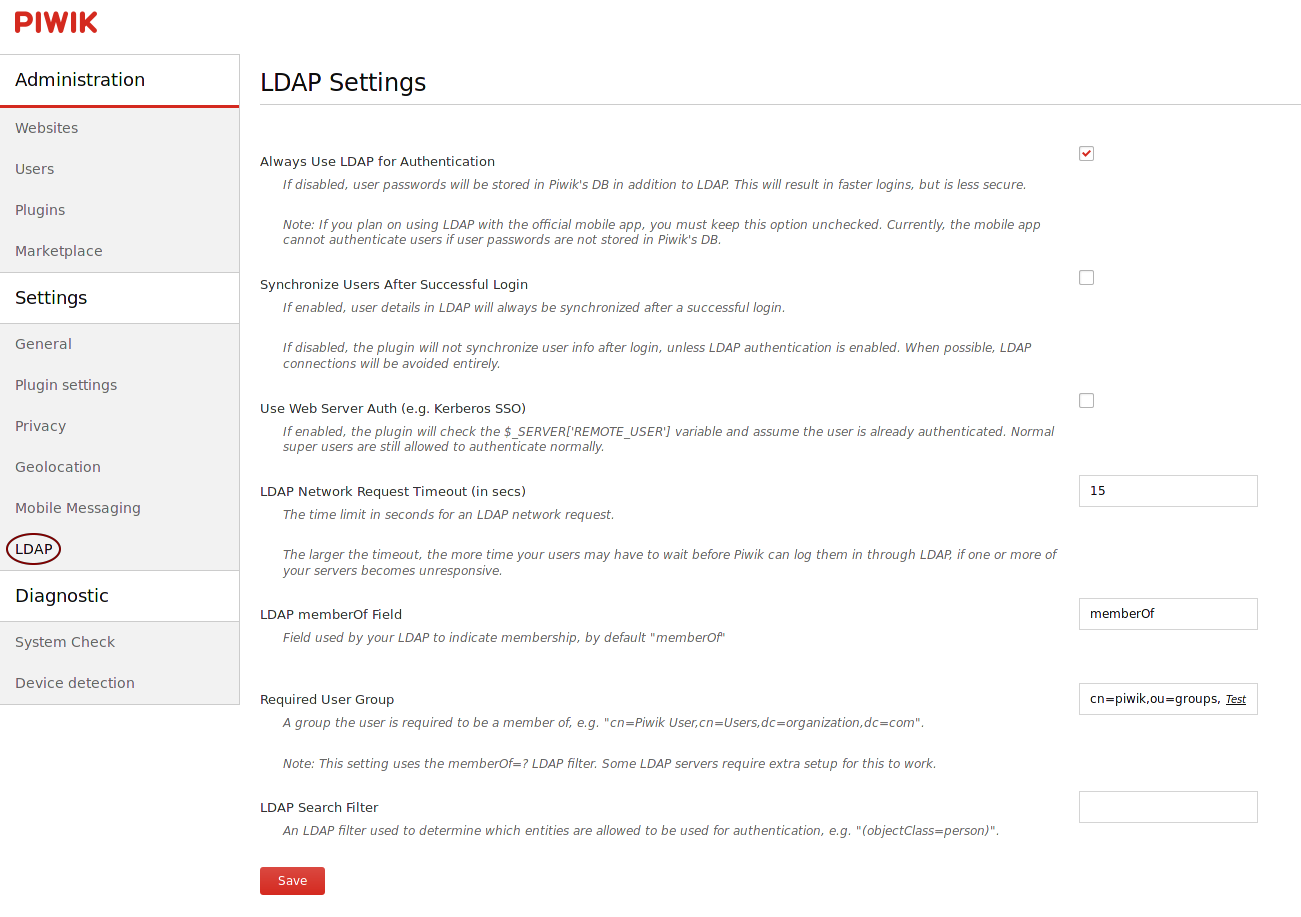
Fig. 6.2.3 Configure the LdapLogin plugin.
Click the link, then a list of LDAP settings should be available on the right, as shown in Fig. 6.2.3. Make
sure the LDAP server settings are similar to the settings in Fig. 6.2.4, (replace dc=example,ec=com
with the $LDAP_SUFFIX in Install OpenLDAP in the “Base DN” field) and then click
Save.
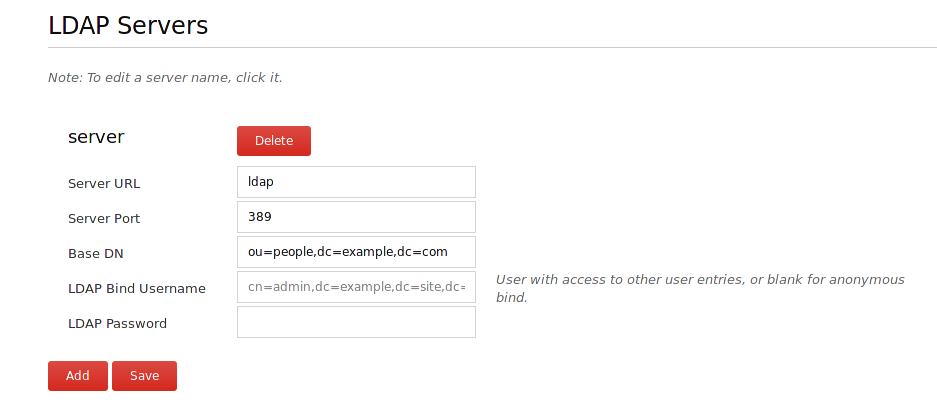
Fig. 6.2.4 Set up the LDAP server connection.
Make sure the rest of the settings looks similar to Fig. 6.2.3. Note that Required User Group should be
set to cn=piwik,ou=groups,dc=example,dc=com, where dc=example,dc=com should be replaced by the $LDAP_SUFFIX
in Install OpenLDAP. Click on the Test link in the Required User Group box to make
sure the configuration is correct. Then click Save.
The configuration above is the recommended settings, but we can also follow LoginLdap configuration guide to configure the plugin differently.
6.2.7. Update Piwik
The Piwik container used here is a self-managed php container, which means that all Piwik files are downloaded and stored in a data container during the Piwik container’s first run. To upgrade, simply use Piwik’s builtin auto updater.
To manually update, run the following command to enter the shell in the Piwik container then switch to /var/www:
ne piwik
# Now in the Piwik container
cd /var/www
Then follow the manual update instructions to update.